There are many ways to automate your backups using plugins and even your hosting cPanel. But in my experience, all existing services make it very difficult for users who simply want some peace of mind.
With Xagio, it’s a whole new ballgame.
And if you spare two minutes to follow these instructions, you’ll have a solid backup plan in place that will save your ass if the site gets hacked or corrupted.
Oh, and did I mention it’s a completely free feature?
Where Do You Find The Xagio Backup Settings?
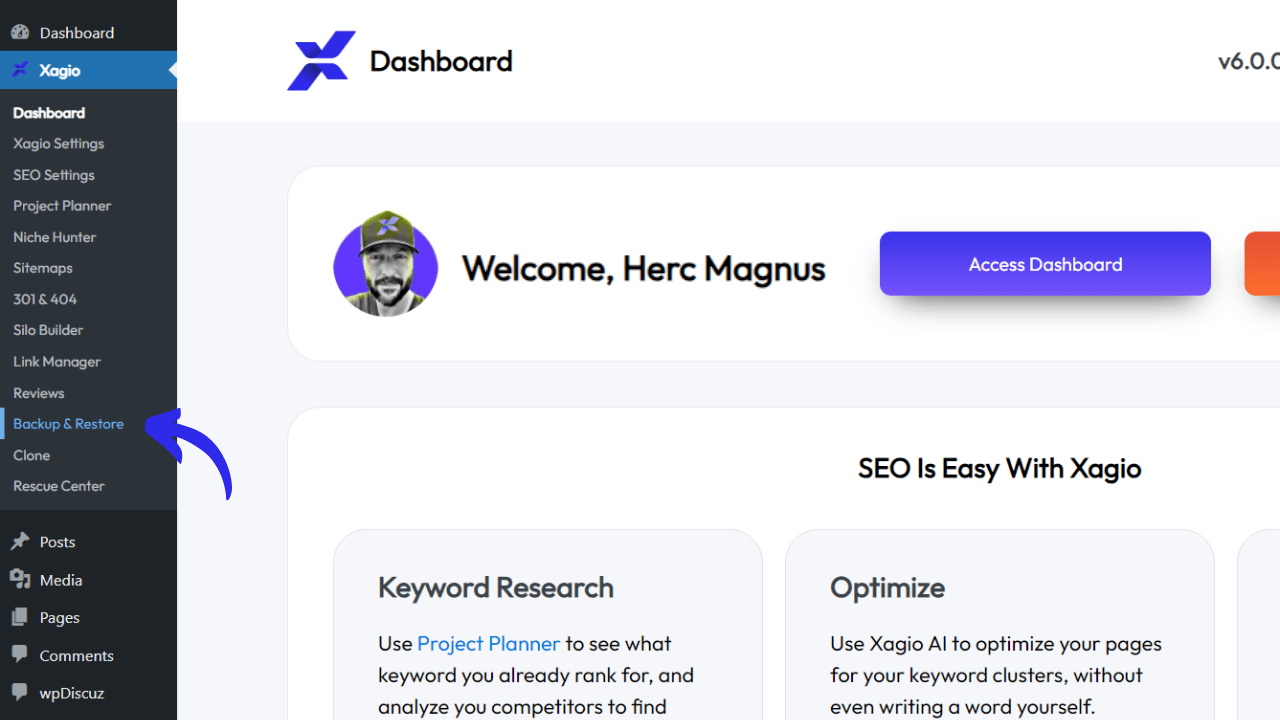
The easiest way to get to the backup settings is to log into your WordPress dashboard, go to the Xagio plugin section and then click on the “Backups & Restore” tab.
We’ve set up this tab to be as user-friendly as possible. You don’t need to understand advanced backup techniques or find out how to get FTP access to your hosting server.
The other major advantage is that you don’t need to install additional plugins that often come with paywalls for simple scheduling features.
Let me show you how quickly you’ll be up and running.
The 2-Minute Setup Process
There are three steps in my process, and technically, there are only two.
1. Authorize The Backup Location
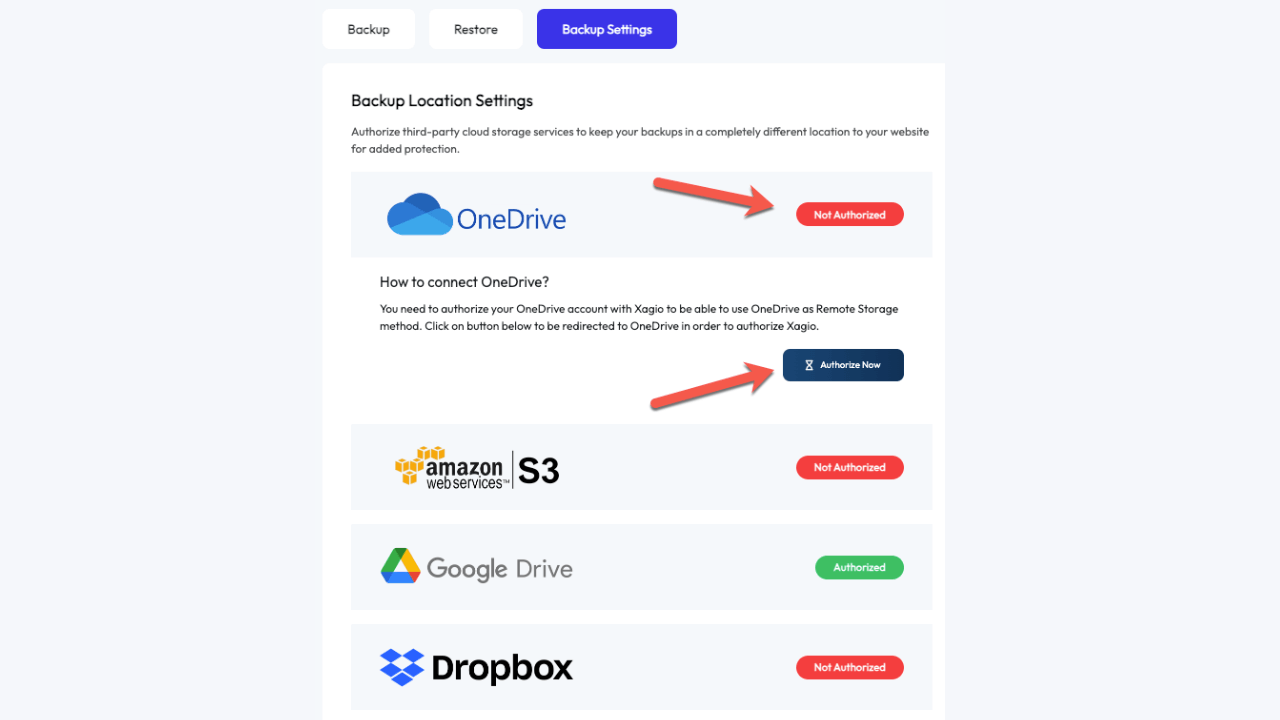
Navigate to the Backups & Restore tab of the Xagio plugin and then click on the Backup Settings tab.
On the left side, you choose the backup location, which includes MS OneDrive, AWS, Google Drive, and Dropbox.
Simply click on “Not Authorized” followed by the “Authorize” button.
You’ll be redirected to the relevant cloud storage provider, where you must log in and authorize Xagio to access the storage.
2. Set Your Schedule
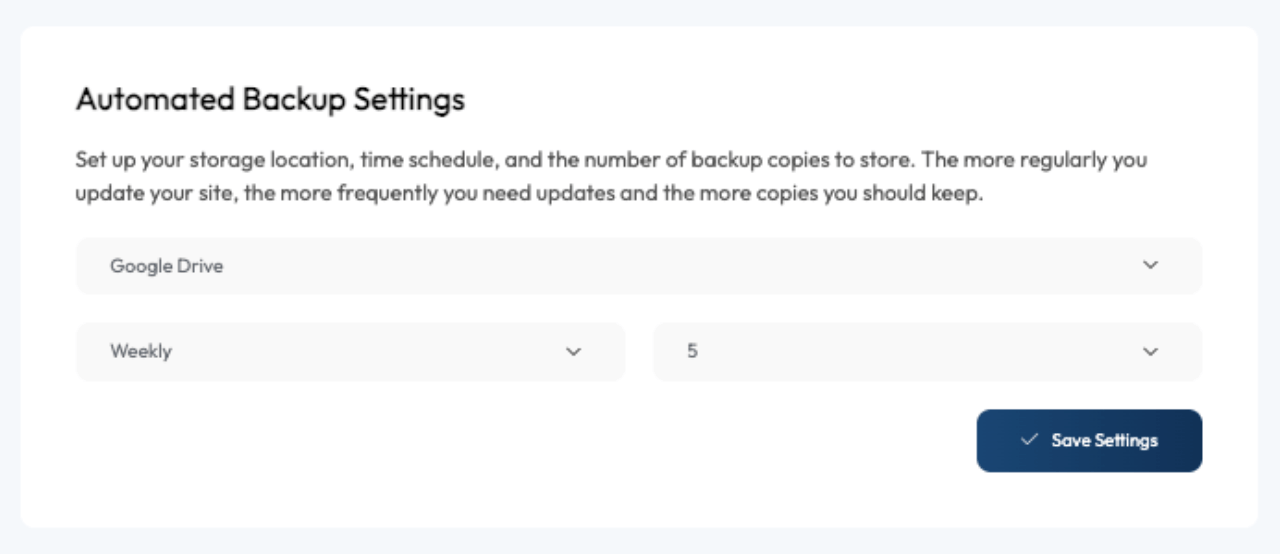
In the “Automated Backup Settings” section, you have a few simple options to choose from.
First of all, choose the location, which should be the one you authorized in step 1.
Then, decide on how often Xagio should run a backup. This decision depends on how often you add new content to a website. If you add content a few times a month, then weekly will be enough.
Otherwise, go for a daily update if you post new content several times a week.
The final thing you have to set is how many backup copies you want to keep on your cloud storage drive.
Keep in mind that if you have a large website, storing many backups will eat into your storage space.
The best way to decide this value is based on your site size and the amount of storage you have available. I generally recommend having five or more copies to give you enough of a range to fall back on.
3. Relax And Monitor Your Backups
Basically, that’s it. You can now relax with a cup of coffee, knowing that if you get hacked or your site gets corrupted, you can restore a backup with just a few clicks.
More on that below.
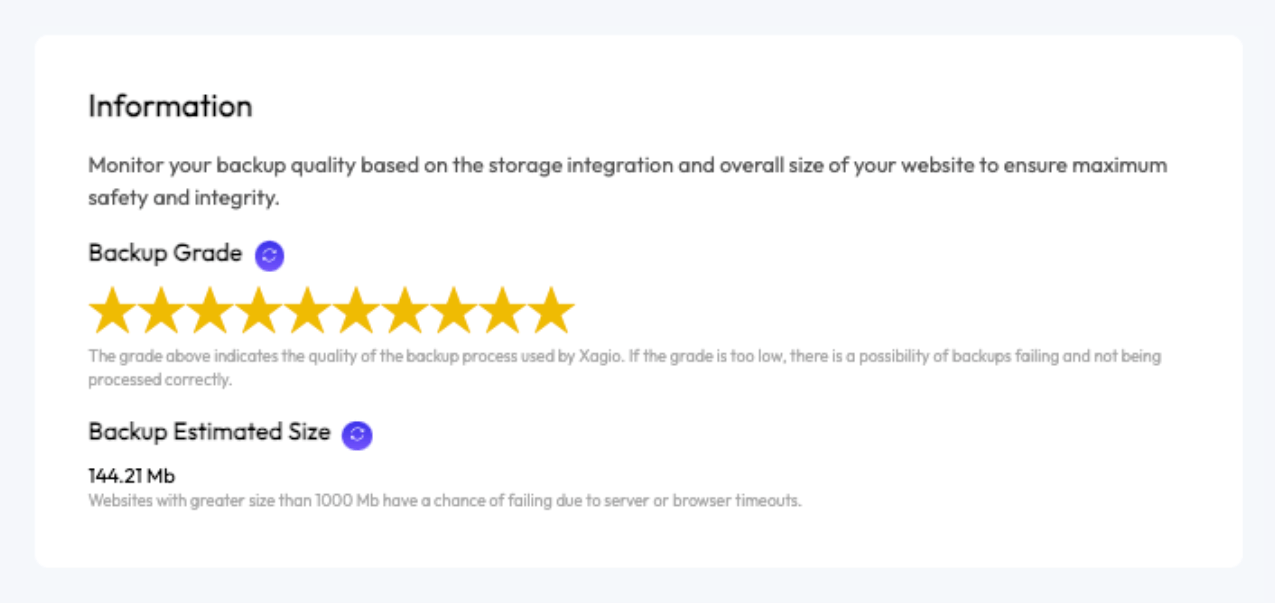
Check in every week to make sure that your Backup Grade is above six stars. Xagio measures connection and upload speeds and then assigns a grade.
A grade of six or higher indicates that there is a high success rate in completing backups.
What Do You Do If Your Site Has A Problem?
If you’ve been hacked or your site has been infected with dodgy malware, you could spend days and thousands of dollars trying to remove and fix the issues.
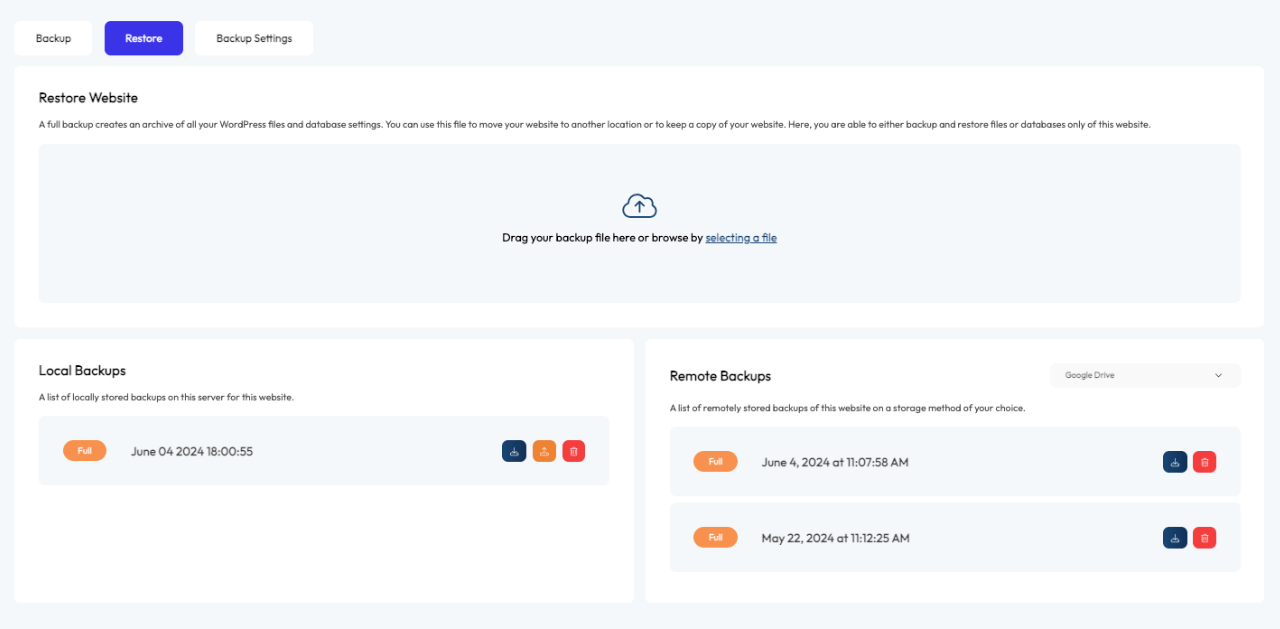
The easier option is to head to the “Restore” tab and use one of your backups to fix the problem.
You can pick either a file on your computer, a local server backup, or one of the Remote Backups.
Within a few minutes, you’ll be back to a fully functioning website.
As you can see, we truly have made it as easy as possible to setup backup automation without the need for additional plugins and advanced IT skills.
