Private Blog Networks (PBNs) are still an important part of strategic backlinking for many SEOs. But if you’ve ever managed even a small PBN, then you know there are a lot of challenges.
It’s not just about finding and creating PBN sites that will deliver results; you also need to manage the sites and keep track of all the important information, like WP details, registrars, hosting, and even just the topics.
If you’re like I was, that means managing a large spreadsheet that becomes increasingly difficult to deal with.
That’s why I had my team develop a few tools within Xagio that make website management infinitely easier with less pain and stress.
The Pain Points Of Managing PBNs
In my experience, using a spreadsheet to manage a PBN stops becoming a viable option once you hit about 20-30 sites.
But even before then, using a spreadsheet was slow and often led to simple management mistakes.
First of all, you need some way of tracking all the login details for the WP backend. You can do it to an extent with password managers, but if you have a team of people working with you, it’s not that easy to share those logins.
Here’s the thing, though, it only gets more difficult from here.
The second thing I always struggled with is managing updates and plugins on my PBN. Normally, it means logging into the WP dashboard and then manually adding and updating plugins.
Adding new plugins is a similar problem, where you’d have to manually log in, search for, install, and activate each plugin.
Doing that for 20 sites could take a few hours, and for a PBN of 100 or more sites, you’re looking at days’ worth of work.
And finally, when you’re managing a large number of sites, you really need a way to easily filter those sites by things like:
- What registrar is used for the domain;
- Which hosting platform is used;
- What CMS is used (WP, Wix, Shopify);
- What is the topical relevance of each site;
- How powerful is each site.
It was that last part that broke the camel’s back in my PBN spreadsheet, and that’s when I got my developers to create a solution in Xagio that made things insanely easy.
How Xagio Solves These Problems
There are three key features in Xagio that make PBN management extremely easy.
1. One-Click Access To Every WordPress Site
The more PBN sites you have, the more passwords you have to keep track of. And simply adding them to a password manager isn’t as convenient as it may sound.
What if you need to share specific passwords with team members?
Here’s what you can do with Xagio.
As soon as you install and activate the Xagio plugin on a PBN site, it gets added to your Cloud App, and you can see all the sites on the Websites tab.
Simply click on the “Login” button for a website, and Xagio will open a new tab and automatically log you into the WP dashboard.
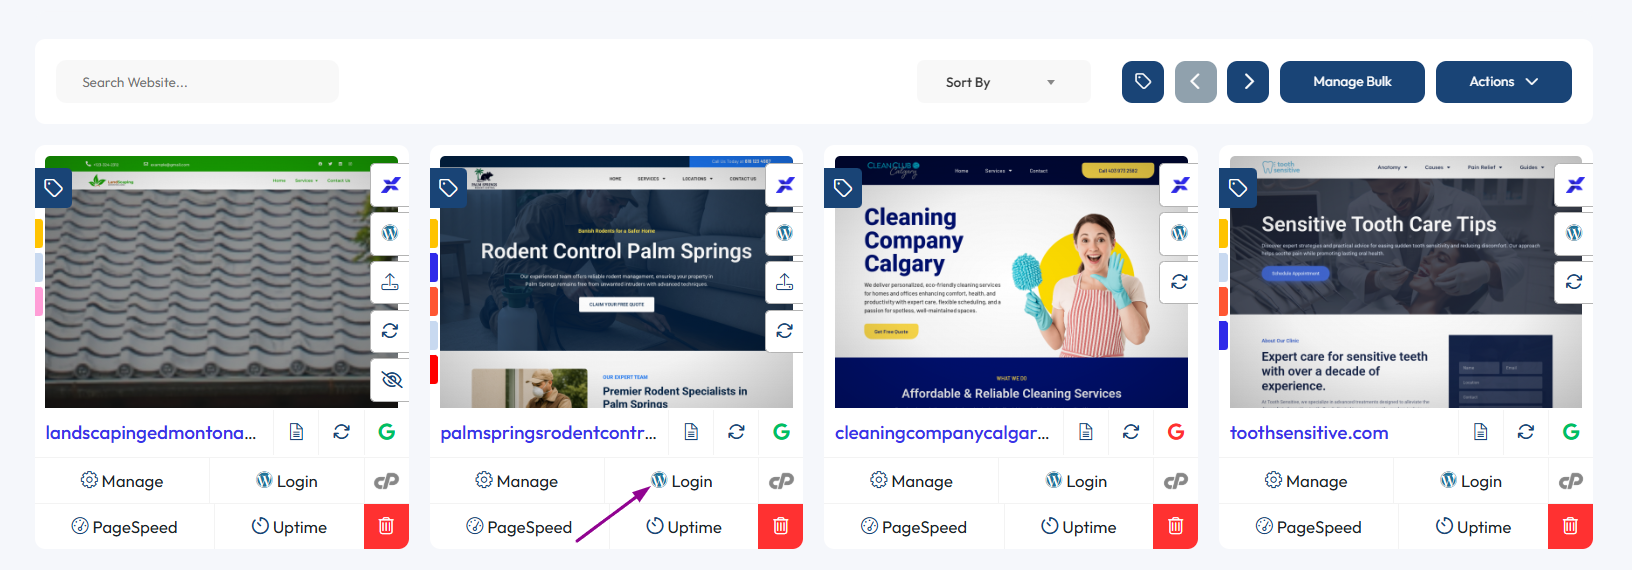
Whether you have five sites or 500, it’s the easiest way to get one-click access to PBN sites.
And what about sharing access with others?
With Xagio, you can create a sub-user account and restrict access to those sites that have a PBN tag added. You could also create a specific tag for a subset of PBN sites to provide more limited access.
More on tagging your PBNs shortly.
2. Centralized WordPress & Plugin Management
Managing and updating WP core, plugins, and themes is another major challenge. Yes, you can set up WP to automatically apply updates, but there are plenty of times when I need to install or delete a plugin on my PBN sites.
Xagio solves that problem in a very cool way.
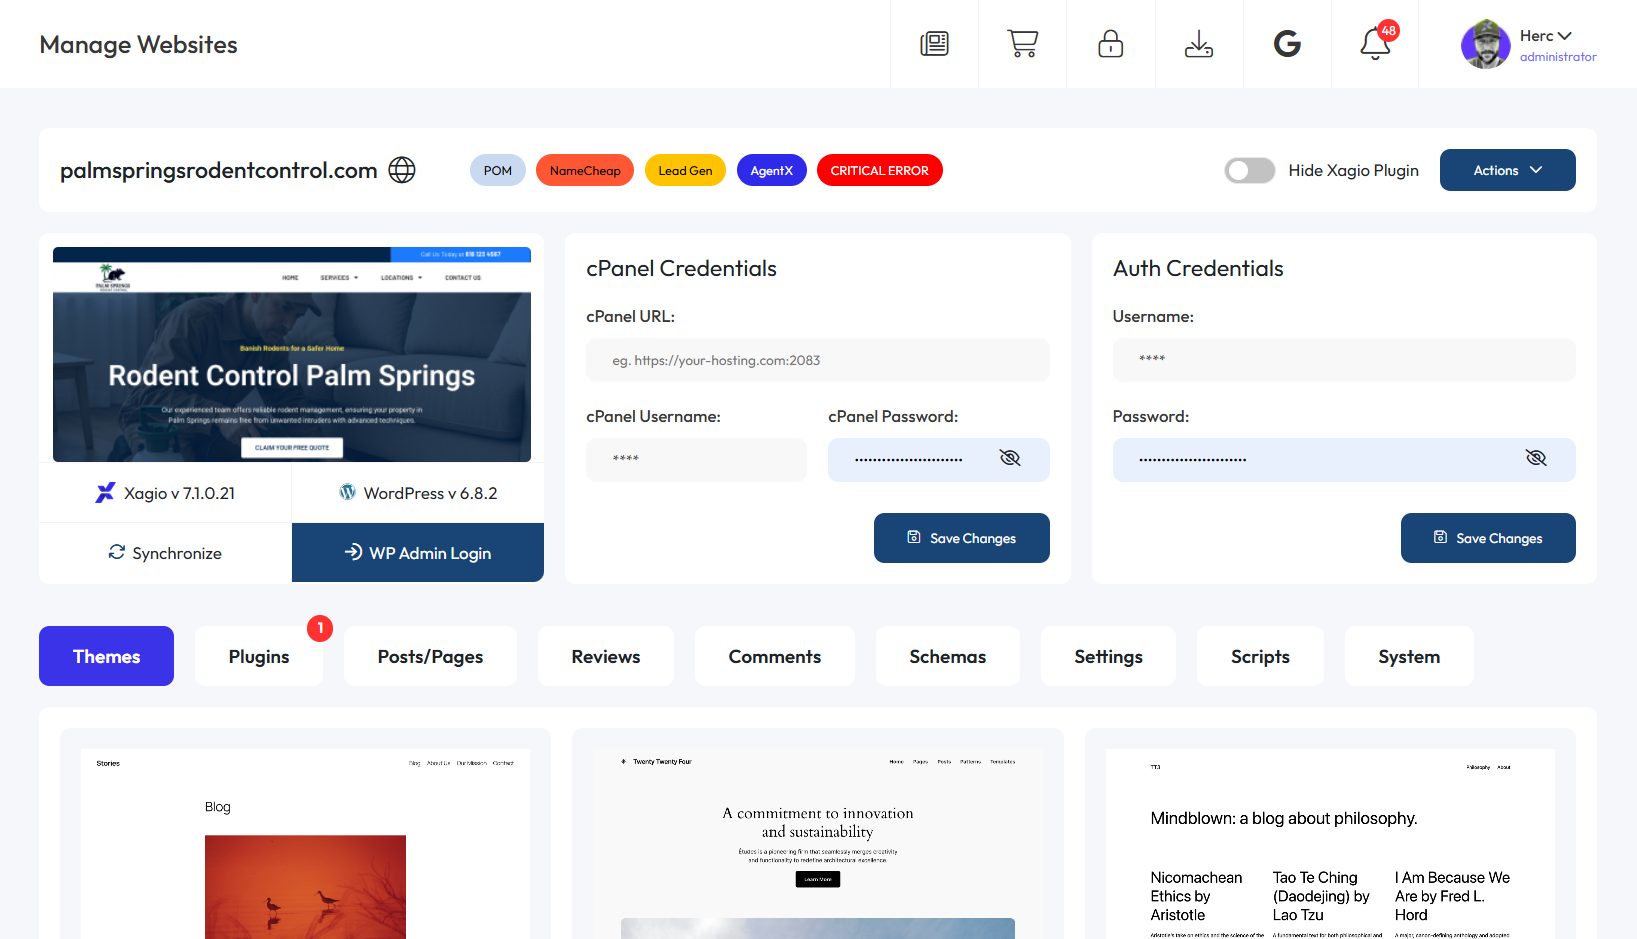
The first thing you can do is work on themes and plugins directly from the Xagio Cloud App without having to log into every single site.
Simply click on the “Manage” button on the Websites tab to access this feature.

From the next screen, you can update, activate, deactivate, and add themes and plugins.
It’s great for micro-managing individual sites, but Xagio offers an even more powerful feature.
On the Websites tab, click on the “Manage Bulk” button.
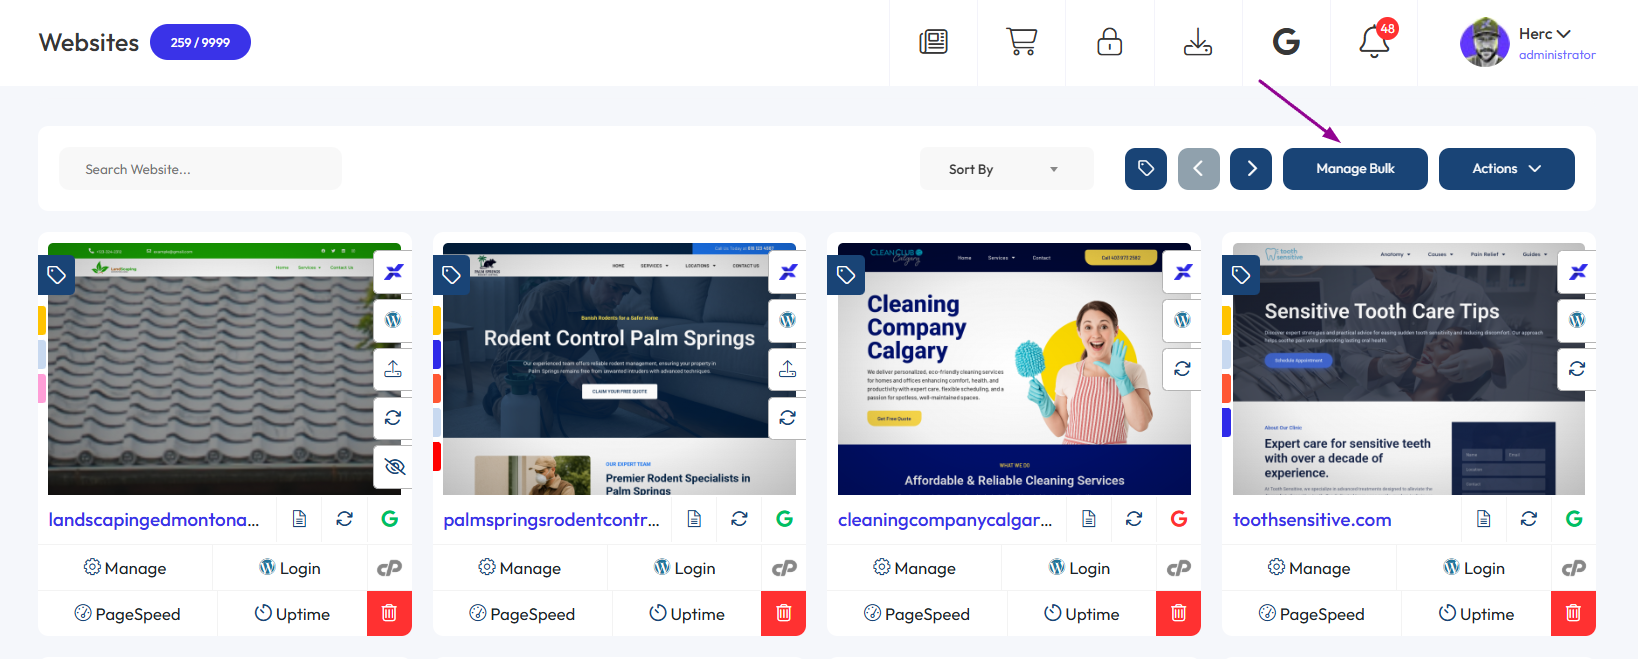
On the next screen, you can filter and select certain websites you’re managing and then click the “Upload Plugin(s)” button.
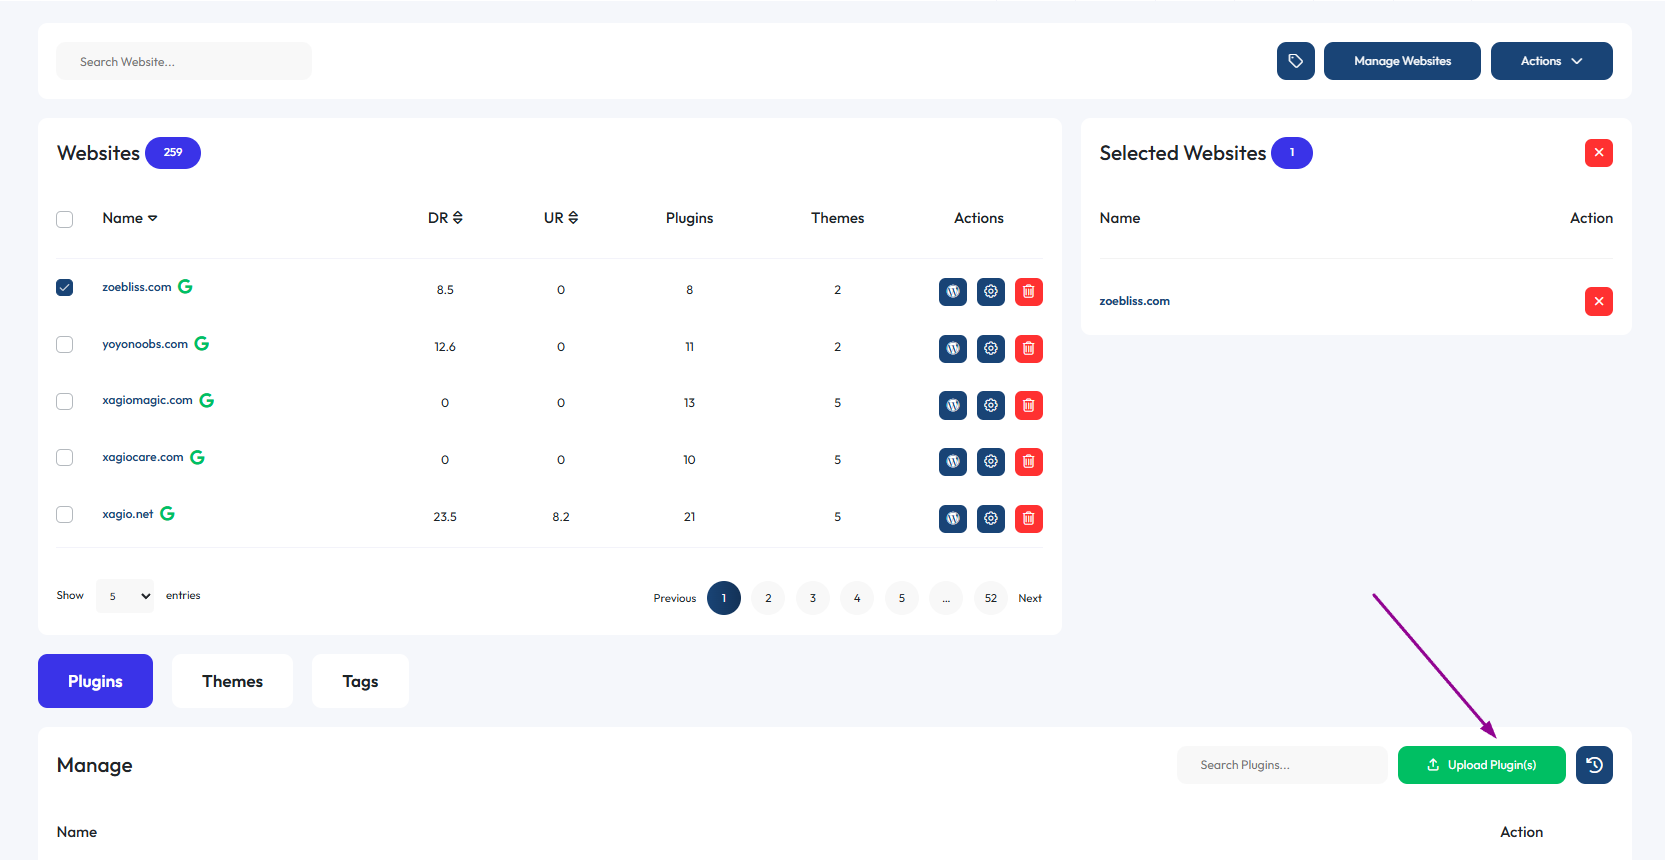
You then choose a plugin to upload to all of the selected sites in one go, saving you hours, or even days of manual work.
Once it’s uploaded, use the plugins list at the bottom to activate it, and the hardest part is done.
3. Tagging & Organization That Actually Makes Sense
Tagging your websites in Xagio is a habit you should get into right from the start. You can do this on the Websites tab, and the process is fast and simple.
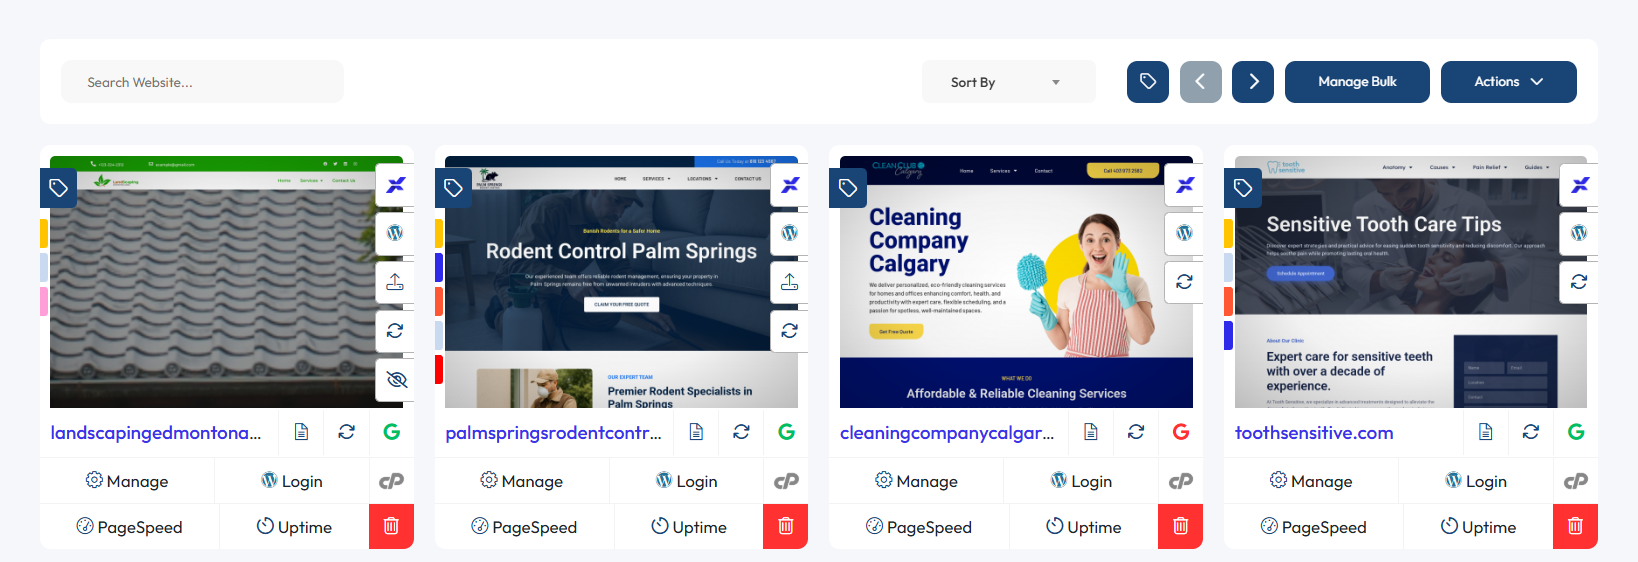
Once you click on the “Manage Tags” button, you get the tag manager window, and this is where you can drag and drop or add new tags as needed.
Here are a few things I do.
First of all, I add a tag to identify a site as a PBN. Then I add one for the registrar and one for the hosting service.
The great thing with these last two tags is that you can also add login URLs for those services.
After that, your imagination and organization needs are the only limit. You can add a PBN Power tag that allows you to find sites with different levels of link juice.
You can also add tags that identify the high-level topic of a PBN site as well.
Once you have added all the tags you need, simply use the filter feature on the Websites tab to list out very specific sites as you need them.
Tip: Here’s a helpful guide on adding tags.
Try These Free Xagio Features Today
I didn’t want to spoil this earlier, but all of the above features are free in Xagio. You don’t need a paid account or any Xags to use them.
And the sooner you get into the habit of using tags, the easier it is to manage your PBN. I know a lot of people who did the tagging in a few stages over a couple of days and then never looked back.
Start organizing your network today, and you’ll wonder how you ever managed without it.